Dash Cam Installation and Wiring Options for Indian Cars
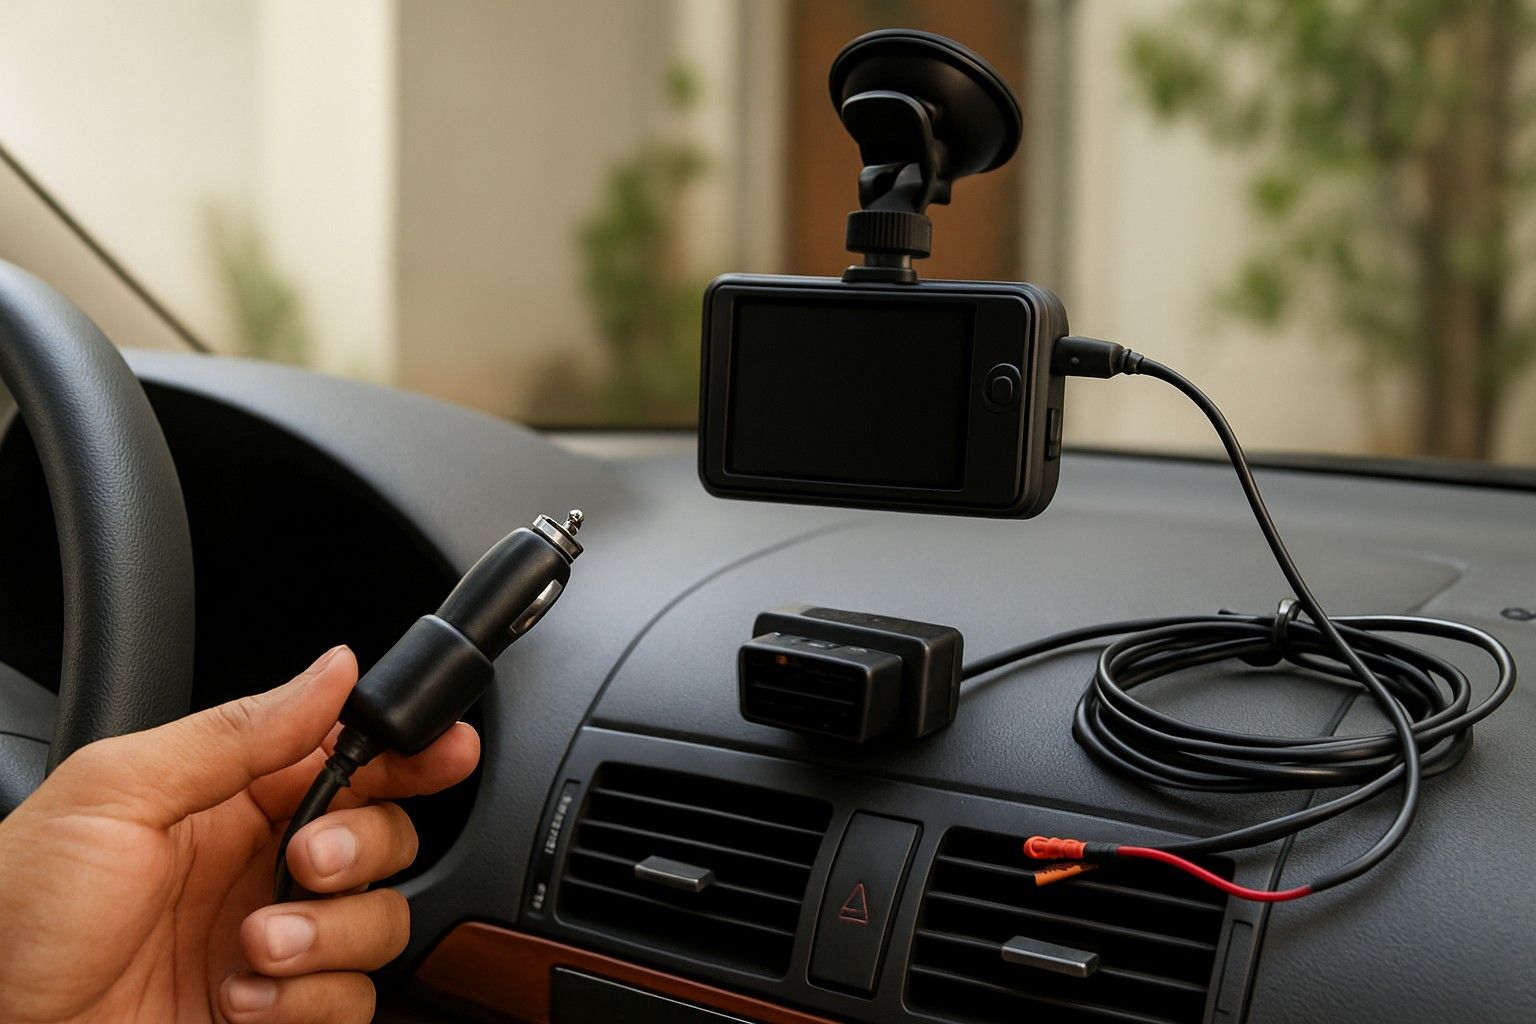
If you've just bought a dash cam or are about to, the box doesn't answer the real question sitting in your head: how does this thing actually get power, and does it need a mechanic to wire it in? The answer depends less on the camera itself and more on how much cable clutter you're willing to live with and whether you want parking mode to work when the car is switched off. This article walks through the wiring options, the self-install versus fitment-shop decision, cable routing, cost, and the storage settings you'll configure once the camera is powered up.
Cigarette-Lighter, OBD and Hardwired: The Three Ways to Power It
Every dash cam needs a constant or switched power source, and in an Indian car you have three practical routes to get it there.
The cigarette-lighter (12V socket) cable is what almost every dash cam ships with. You plug it into the socket near the gear lever or dashboard, run the cable up to the windshield mount, and you're recording within minutes. It needs no tools, voids no warranty, and can be unplugged in seconds if you sell the car or want to move the cam. The catch is that it occupies your only 12V socket, so charging a phone or running an air compressor means unplugging the cam, and the visible cable running across the dash isn't the neatest look.
An OBD-based power tap draws from the OBD-II diagnostic port under the dashboard, usually through a small adapter cable. This frees up the cigarette lighter socket and can be tidier since the port is already tucked away, but not every dash cam supports OBD power, and the port draws a small trickle even when the car is off, which some owners worry about with older batteries.
Hardwiring means connecting the camera directly to the fuse box, usually tapping into an ignition-switched fuse for normal recording and a constant-live fuse for parking mode, through a dedicated hardwire kit. This is the only way to get true parking-mode surveillance without a cable running to the lighter socket, and it looks factory-fitted once done. It does mean opening trim panels and working near the fuse box, which is why most owners get it done rather than doing it themselves.
Can You Self-Install or Should You Visit a Fitment Shop?
A cigarette-lighter setup is squarely a self-install job. Stick the mount to the windshield behind the rear-view mirror, plug the cable into the socket, tuck the wire along the headliner and A-pillar trim with the clips most cams include, and you're done in under fifteen minutes with no tools beyond your hands.
Hardwiring is where the calculation changes. Tapping into the fuse box correctly means identifying which fuse slot is switched with ignition and which stays live constantly, using an add-a-circuit adapter rather than cutting into the original wiring, and routing the new cable from the fuse box, under the dash, up the A-pillar, without pinching it in a door seal or letting it rest on a moving pedal linkage. Get the fuse selection wrong and you either drain your battery overnight or lose parking-mode recording entirely. A fitment shop that does this daily will have it wired correctly in under an hour, with the cable dressed properly and no rattles.
The practical middle ground many owners choose is to self-install on the lighter socket first, live with it for a few weeks to confirm the camera and mount position suit them, and only then invest in a proper hardwired job at a fitment shop or accessory counter once they're sure this is the setup they want to keep long-term. That avoids paying for hardwiring twice if you end up repositioning the camera or switching models.
Routing Cables Neatly Along the Windshield and A-Pillar
However the cam is powered, the cable still has to travel from the windshield mount down to a socket, port, or fuse box, and how you route it decides whether your dashboard looks tidy or like an afterthought.
The standard path is along the top edge of the windshield, tucked into the rubber weatherstrip gap where the glass meets the headliner, then down the A-pillar trim on the driver's side. Most A-pillars in Indian cars have enough gap between the plastic trim and the metal body to slide a flat cable behind it without prying the trim off completely, though some SUVs and sedans with airbag curtains routed through the pillar need more care; pulling too hard on A-pillar trim near a side airbag is not worth the risk, so a gentle release rather than a forceful pull is the right approach.
Once past the A-pillar, the cable runs down toward the dashboard edge and then either to the lighter socket, the OBD port under the steering column, or across to the fuse box, depending on the power method chosen. Cable clips, usually included with the camera or bundled with a hardwire kit, hold the wire flush against the trim so it doesn't hang loose or swing with the car's movement. Avoid running the cable across the dashboard's visible surface loose, since it flaps under the AC vents and becomes a distraction while driving. A neatly routed cable is invisible from the driver's seat, which is really the test of a good installation.
Typical Installation Cost in India
A cigarette-lighter install costs nothing beyond the camera itself since you do it yourself with parts already in the box, and this applies regardless of whether you bought a camera near ₹999 or one closer to ₹29,999.
Hardwiring, on the other hand, is a separate line item on top of the device price. Fitment shops typically charge for the labour of routing the cable through trim panels and wiring into the fuse box, and the hardwire kit itself (fuse taps, add-a-circuit adapter, extra cable length) adds a modest cost if it isn't bundled with the camera. Some cameras in the ₹5,499 and ₹14,999 price bands include a hardwire kit in the box, which brings the added cost down to labour alone, while cheaper cameras in the ₹1,499 range usually ship with only the lighter cable, meaning you'd buy the kit separately if you want parking mode wired in.
This is exactly why it makes sense to add fitment cost on top of the device price when budgeting, rather than comparing camera prices in isolation. A camera at the top of its price band with a bundled hardwire kit can work out similar in total spend to a cheaper camera plus a separate kit and labour charge. Since the average dash cam in the market sits around ₹4,999, factoring in a hardwiring charge is a realistic adjustment to make before you finalise a budget, rather than a surprise at the fitment counter.
Setting Up SD Cards, Loop Recording and Parking Mode
Once the camera is powered and mounted, the settings that matter are the SD card, loop recording, and parking mode, and getting these right is what makes the installation actually useful rather than just a camera that's technically on.
Use a card rated for continuous write cycles rather than a generic one meant for photo storage; dash cams write and overwrite constantly, and a card not built for that wears out fast or starts dropping frames. Format the card in the camera itself after inserting it, not on a laptop, since the camera's own filesystem structure for loop recording needs to be set up correctly from the start.
Loop recording splits footage into fixed-length clips (commonly one to three minutes) and automatically overwrites the oldest clip once the card is full, so you never run out of space and never have to manually delete old footage. The one thing to configure correctly is the protected-file allocation, a portion of the card reserved for footage locked by impact detection or manual save, so an important clip isn't overwritten before you've pulled it off the card.
Parking mode only works at all if the camera has power while the car is off, which is why the wiring choice made earlier directly decides whether this feature is usable. A lighter-socket install typically loses power the moment the ignition is off, making parking mode a non-starter, while a hardwired setup with a constant-live tap keeps the camera armed to detect motion or impact. This is also where parking mode ties back to how the cam handles power and heat, since a camera drawing constant low power in a closed, sun-heated car needs to manage that load without overheating or draining the battery flat overnight.
Installation Choices in the Bigger Buying Picture
The wiring method you choose isn't a footnote you sort out after buying; it shapes which camera makes sense for you in the first place. If parking-mode surveillance while parked at a mall or office is the reason you want a dash cam at all, that decision points you toward a hardwired install and a camera that supports it well, which then affects your budget once you factor in fitment cost. If you mainly want a witness to daily commute incidents and don't care about the car being watched while parked, a simple cigarette-lighter setup lets you spend your full budget on the camera itself and skip the installation cost entirely.
This is worth deciding before you shortlist cameras, not after, since it changes how much of your budget goes to the device versus the fitment. If you haven't locked in that decision yet, it helps to return to the full buying guide to finalise your pick, where the installation trade-offs sit alongside resolution, storage, and price-tier choices as one connected decision rather than separate afterthoughts.
Whichever route you take, the wiring decision comes down to one honest trade-off: a lighter-socket install is free, quick, and reversible but leaves parking mode unusable, while hardwiring costs a bit more in labour and parts but gives you a camera that watches the car even when you're not in it. Match that choice to why you wanted a dash cam in the first place, and the installation stops being a puzzle and becomes a five-minute decision at the fitment counter.
Comments
Be the first to comment.