Exercise Bike Assembly, Upkeep and Service: What Ownership Really Involves
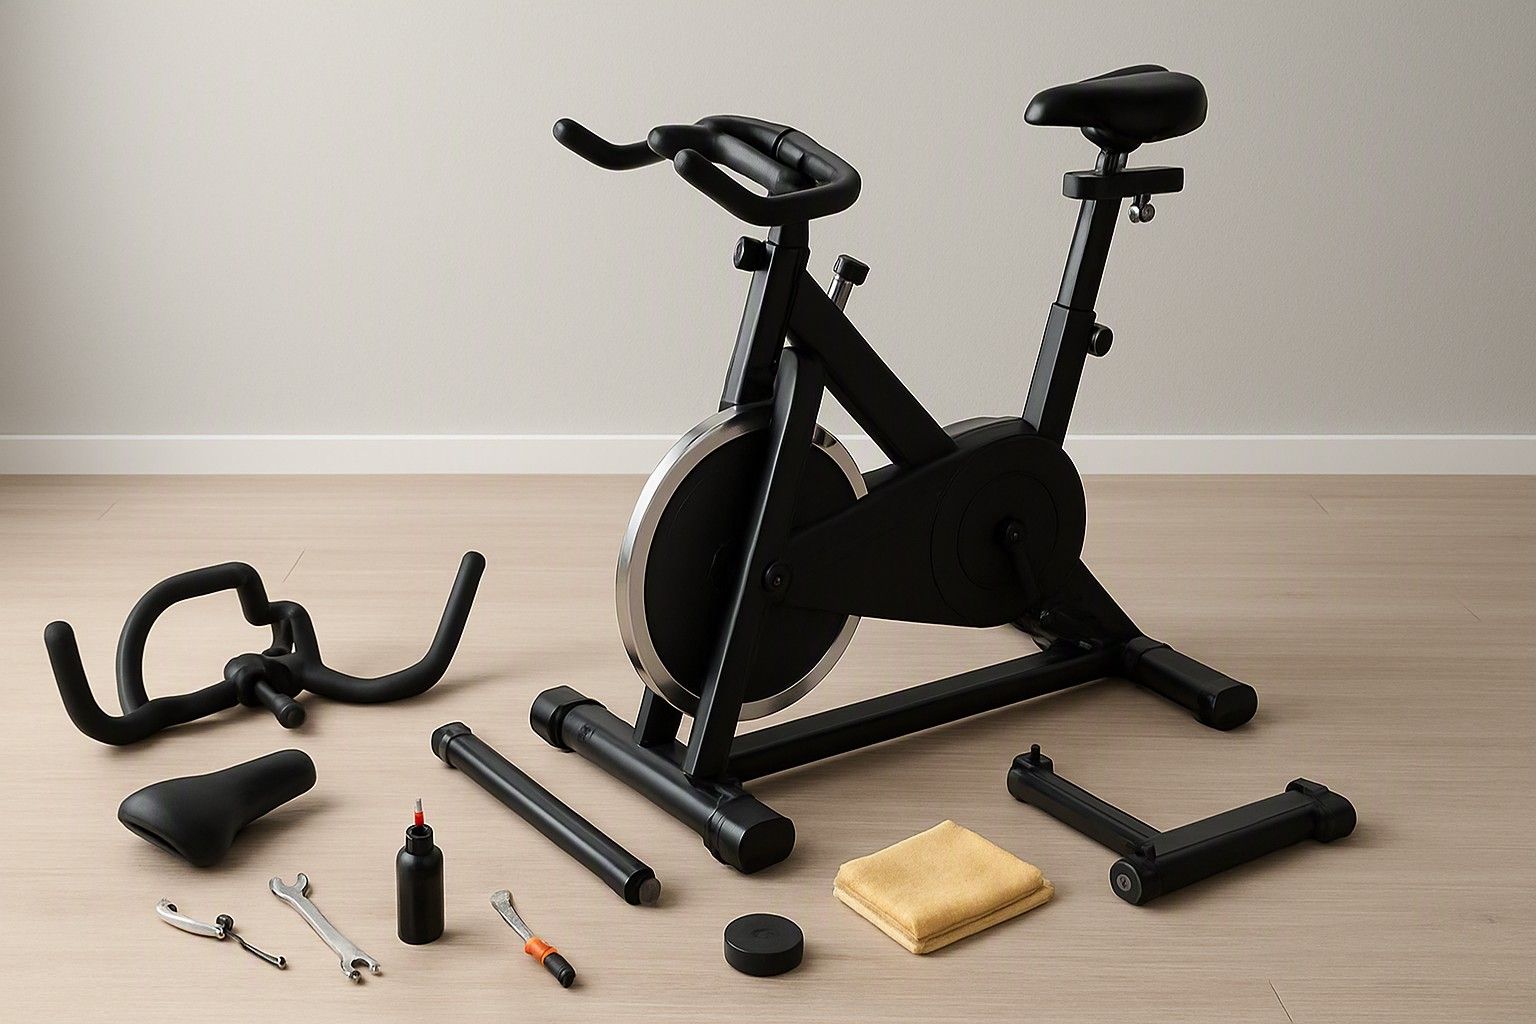
If you have bought an exercise bike, or are about to, and want to know how to put it together, keep it rust-free through the monsoon and get it fixed when something fails, this article is for you. Upkeep is mostly a few minutes of weekly care plus an occasional cheap part, and the real trouble starts only when a wobble, a squeak or a warranty claim gets ignored. Here is what ownership involves in an Indian home, from the day the carton arrives.
Self-Assembly vs Paid Installation
Most exercise bikes arrive with the main frame already joined, so assembly means attaching the stabiliser legs, pedals, seat, handlebar and console. Two people can usually finish it in an hour or two, and the basic spanner and Allen keys are normally in the box. Open the carton carefully and photograph the contents before you start, so a missing bolt or a dented part can be claimed as transit damage.
If you self-assemble, lay out all parts first and thread every bolt loosely before tightening any of them. Tightening early pulls the frame out of alignment and is a common cause of wobble later. Note that the left pedal is usually reverse-threaded, so it tightens in the opposite direction to the right one. Forcing it will strip the thread. Finish by adjusting the levelling feet so the bike stands firm on your floor.
Paid or seller-provided installation suits you if the listing promises it, if you are not comfortable with tools, or if you want the installation date recorded against your warranty. Get the promise in writing, because technician visits can take several days, particularly outside the metros. If the seller offers installation as an optional extra, ask what it covers before paying. A bike that wobbles from day one because of rushed fitting is a nuisance whichever route you choose.
Weekly Care: Sweat, Dust and Rust in Humid Cities
Sweat is the main enemy. It is salty and slowly eats into bare bolts, seat rails and frame joints, so wipe the handlebar, seat, console and the frame below your body with a dry or barely damp cloth after every ride. Never spray water or cleaner directly onto the console. Moisture that gets behind the display is one of the most common ways electronics fail.
In Mumbai, Chennai, Kochi, Kolkata and other humid or coastal cities, rust also comes from the air itself. Keep the bike away from open balconies and damp walls, and put a mat underneath so the legs don't sit in floor moisture. If you cover the bike between rides, use a breathable cotton sheet rather than plastic, which traps moisture against the metal.
Once a week, look over exposed bolts, pedal axles and the seat post for orange spots. Wipe them clean and apply a thin film of light machine oil. Touch up any chipped paint before rust spreads under it. Once a month, brush dust from around the flywheel cover and the resistance knob, and check that the bolts are still snug. This takes about ten minutes and prevents most of the problems covered in the next sections.
Felt Pads, Belts and Pedals: Parts That Wear Out
Not every part ages at the same rate, and which parts wear depends on the resistance system. On a friction bike, a felt or similar pad presses against the flywheel to create resistance, so it wears with every ride, faster at high settings. When resistance feels weak even at the top setting, or you hear a grinding or squealing sound, the pad is usually due for replacement. Magnetic bikes create resistance without contact, so that wear is largely absent, which is the main point in how friction and magnetic drives differ in wear.
The drive belt or chain is the next item to watch on any bike. A belt can stretch or glaze with age, showing up as slipping, a jerky pedal feel or a rhythmic noise. Pedals take the most abuse: straps fray, plastic cracks and the bearings loosen, which feels like play when you rock the pedal by hand. The seat cushion also compresses over time and may need replacing for comfort rather than function.
These are normal wear items, and they are usually the parts a warranty excludes. Before you need one, check whether the brand or seller stocks spares for your model. A bike with no available pads or belts becomes a problem even when the frame is fine.
Fixing Squeaks and Wobble
Start by finding the source. Pedal slowly and listen, then pedal one leg at a time, and check whether the noise follows the crank, the seat or the flywheel. Most squeaks come from one of four places: a loose crank or pedal bolt, dry pedal threads, a dry seat post, or a dry belt or worn pad.
For a loose-feeling frame, check these in order:
- Levelling feet: an uneven Indian floor is the most common cause. Adjust until all four contact points are firm.
- Frame joints: tighten the bolts where the legs, seat post and handlebar meet the main frame.
- Clamps: check that the seat and handlebar adjustment pins are fully engaged.
- Pedals and cranks: rock them by hand to feel for play.
Lubricate carefully. A drop of oil on pedal threads and the seat post is fine. Keep oil off the flywheel, the felt pad and the belt contact surfaces, because it removes the grip that creates resistance and can make the pad useless. If a creak or wobble persists after everything is tightened, stop riding and call service, since a crack at a weld or joint is a safety problem and not a maintenance one.
Display Batteries and Power Adapters
Many console displays run on AA or AAA batteries, while others use a plug-in adapter. A dim screen, flickering digits or numbers that jump around usually mean weak batteries. Swap them before assuming the console has failed. Use fresh batteries of the same type, never mixed ones. If the bike will sit unused for weeks, take them out, since humid air makes leaking batteries more likely and the corrosion can damage the contacts.
If your bike uses an adapter, use only the one supplied or an exact match for its voltage and polarity. A wrong adapter can burn out the console. Where voltage fluctuates, plug it in through a surge-protected socket and unplug it during thunderstorms. If power cuts are common where you live, an inverter keeps the console and the bike’s electronics running without sudden drops. Route the cable so it doesn't get pinched under the stabiliser or pulled by the moving pedals.
If the display works but readings such as speed or cadence stay at zero, the cause is often a loose sensor wire behind the console, not a dead unit. Check that the connector is pushed in firmly. If you are within the warranty period, ask service before opening the console yourself, because a forced or opened console can complicate a claim.
Making Warranty Claims and Booking Service Visits
A smooth claim depends on paperwork you gather on day one. Keep the invoice, note the serial number, and save the photos from unboxing and assembly. Read what the warranty actually covers, since frame, electronics and moving parts are often treated differently, and wear items like pads, belts and pedal straps are usually excluded. Knowing this saves you from raising claims that will be rejected, and the warranty gaps worth catching before purchase are easier to spot on a listing than after a fault appears.
When something fails, contact the brand's customer care or the seller through the channel named on your invoice. Ask for a complaint number. Send a short video that shows the fault, because it speeds up approval and avoids a wasted technician trip. Ask for a visit date and follow up in writing if it slips. Service can be slower in smaller towns, so start early and keep a record of every call.
Don't fit unbranded replacement parts while the bike is under warranty, as it can give the company grounds to refuse later claims. If a marketplace return window is still open and the fault is a defect from delivery, a return can be quicker than a service claim.
When It's Time for a Replacement
Repair makes sense for pads, belts, pedals, batteries and adapters. Replacement makes sense when the problem is structural or recurring. Rust or cracks at weld points, a frame that keeps loosening after tightening, and a crank that has developed play are all reasons to stop riding. A bike that has needed repeated service visits for different faults is also telling you something.
The cost test is simple. Exercise bikes here range from ₹3,500 to ₹50,000, with an average of ₹12,000. If a repair quote, or the combined cost of parts you keep replacing, starts to approach a meaningful share of a new bike in your bracket, whether ₹4,000, ₹12,000 or ₹30,000, a new bike usually makes more sense than another repair. Spare availability matters too. If the brand no longer stocks parts for your model, the bike has effectively reached the end of its life.
When you do replace it, use what ownership taught you. Wear parts that are easy to find, a solid frame and a clear warranty matter more than extra console features, and how a long-lasting bike gets chosen in the first place explains how to weigh these before you buy.
Owning an exercise bike comes down to a careful assembly, a few minutes of weekly wiping, an eye on the parts that wear and a warranty folder you set up on day one. Do those, and most bikes stay quiet, stable and rust-free for years, with repairs that are small and predictable.
Comments
Be the first to comment.